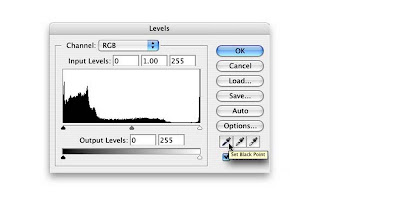
Work on the normal exposure first. Open the levels palate and tweak the end points to set the black and white points. Where this technique differs from many I have seen is we are to pen the info palate and move the cursor over the image to check the image numbers in the shadow and highlight areas. This technique relies on numbers ONLY. It is not a visual check of tone values. So how do you do this?
Open the Levels Palette, be sure the Info Palette is open also. Determine the darkest point of the image by rolling the cursor over the dark areas. Move the shadow point to the right until the darkest area is. no less then 9-12 points in the info palette. Follow the same steps to view and adjust the lightest area in the image but this time move the highlight point to the left until you reach 148-150 (continue to look at the info palette). This technique ensures there will be detail or texture in the darkest area and the lightest area of the image.
Once the end points have been set, move to the curves palate. Place a point at the middle of the palette and use the arrow keys to move that point up to increase contrast. Place another point at the 3/4 shadow where the lines intersect then use the arrow keys to move this point down to add more shadow if needed. This is a visual process.
Original file de-saturated Optimized file


No comments:
Post a Comment